Working my way through the SVS Learn contests, trying to get some visibility.
We're in the thick of it now. Summer in DC, for those who are blissfully unaware, is like living in a pot of boiling water and I'm reluctantly getting used to the thought of being covered in my own perspiration for the next 3.5 months. In related news, my running watch tan is coming on strong; super excited to show it off at the beach when and if we're able to do that again without contracting covid. |
|
When I'm not outside wishing the sun would calm its tatas, I'm inside trying to get noticed by the teachers at SVS Learn. I've decided that this is my singular focus for now so I'm going to enter their contest every month until I feel like they know me. This month's prompt was a full story. You can read about it more on my blog. Spoiler alert: it was hard. |
|
Step 1: Brainstorming and Thumbnailing |
|
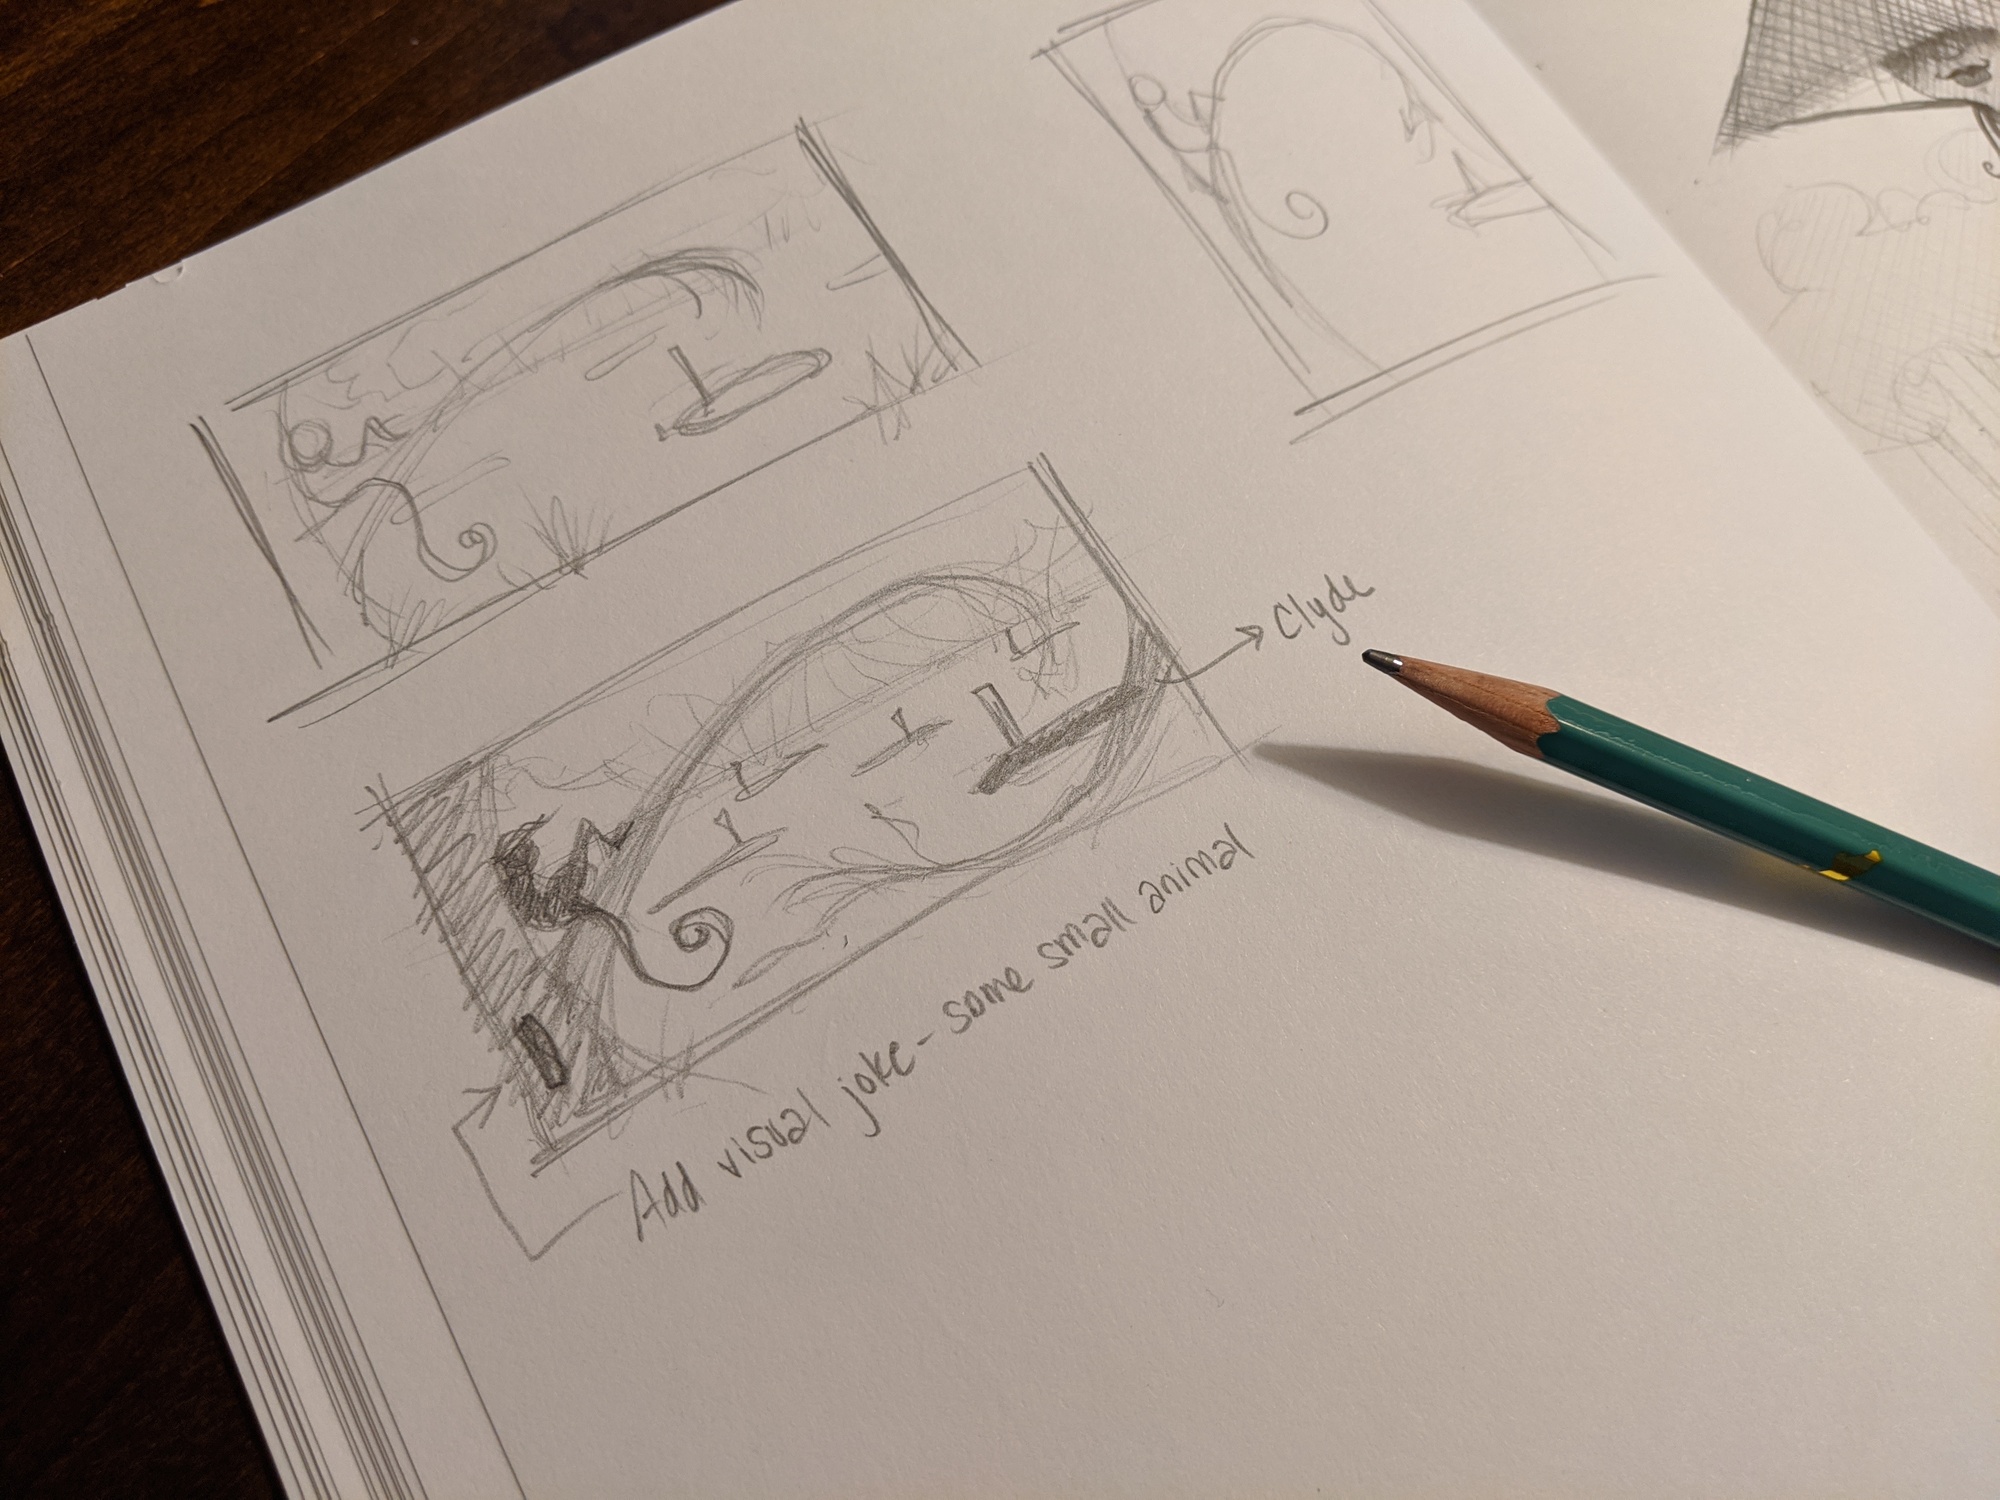
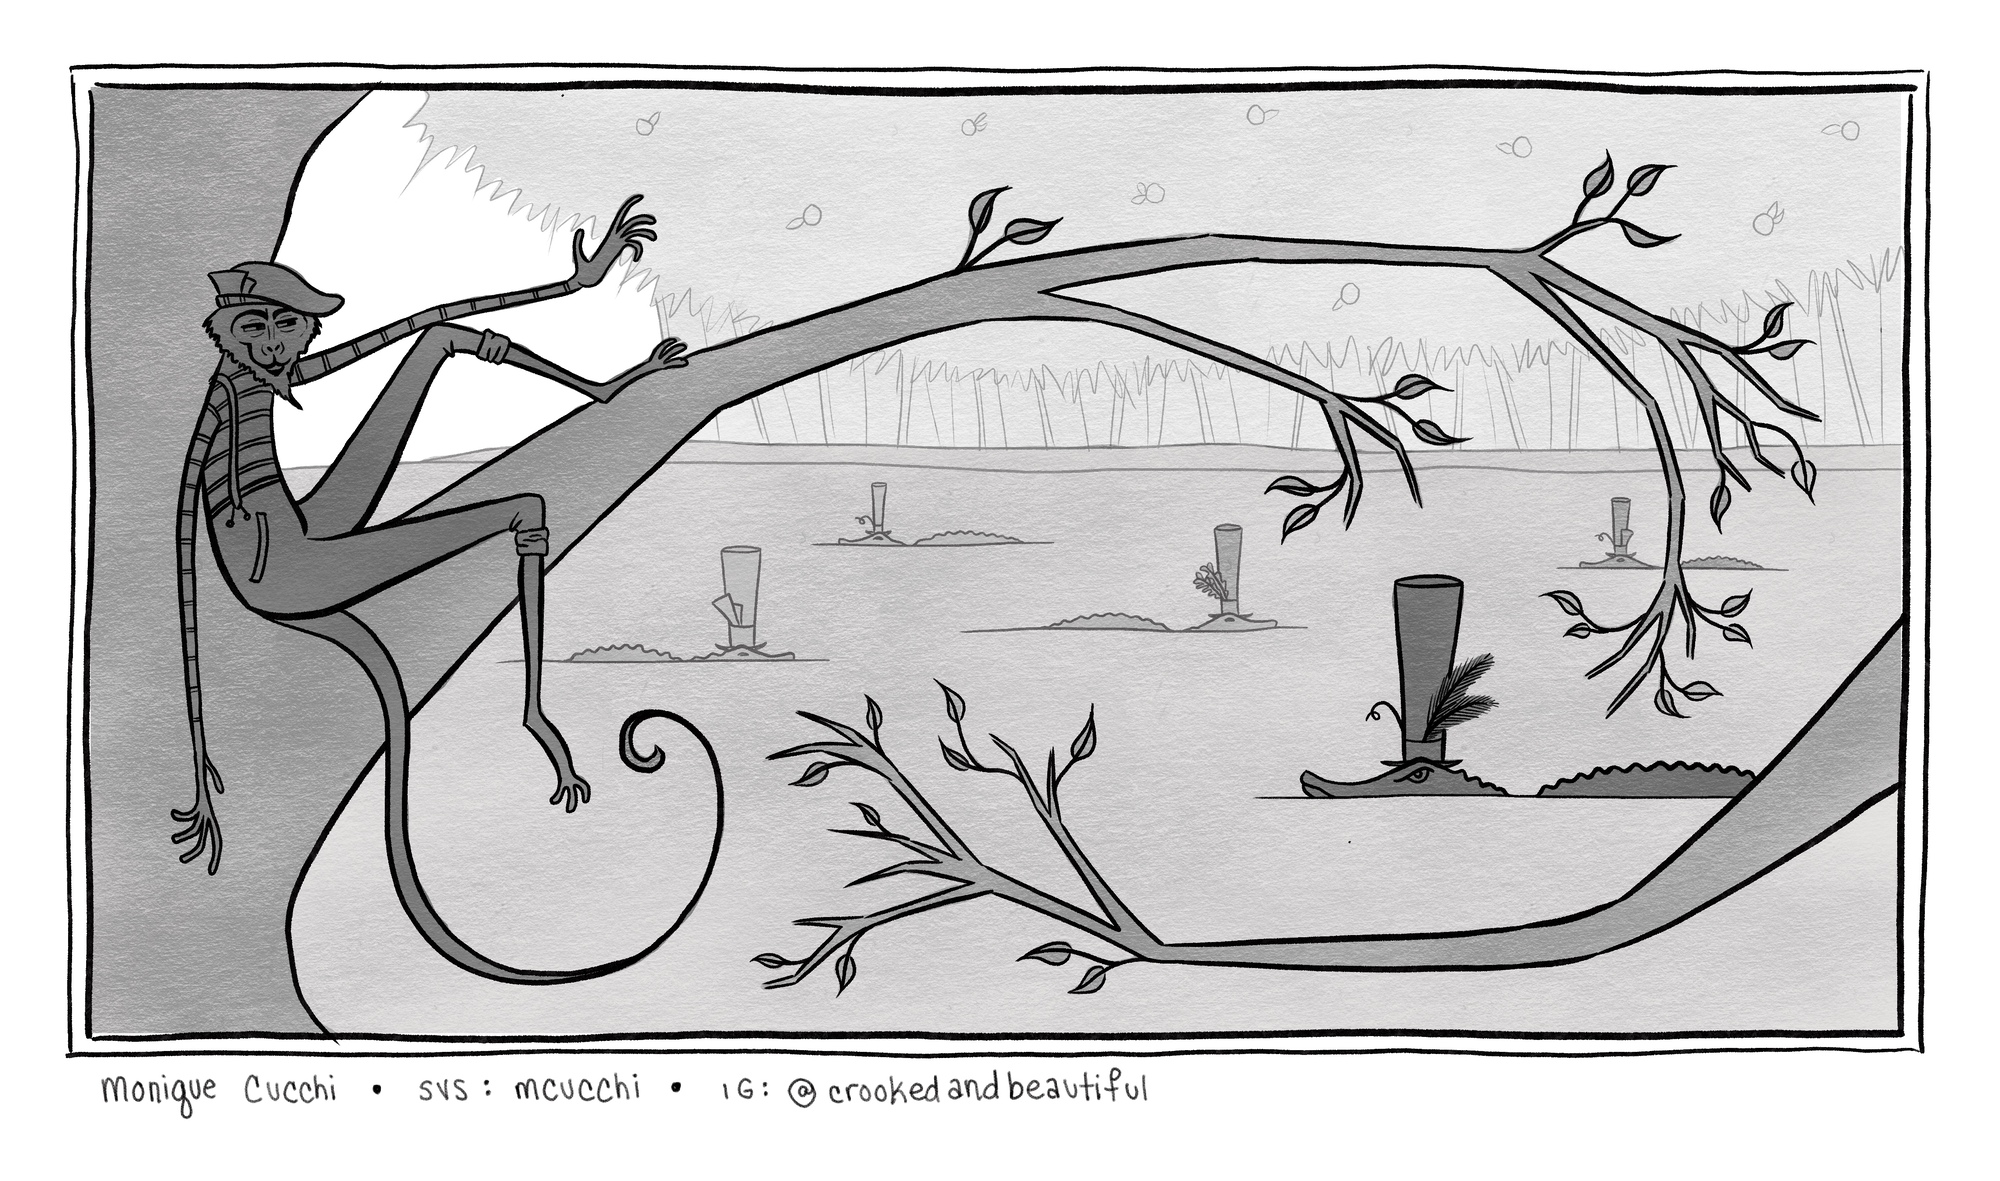
After reading through the story, I started thumbnailing different ideas. I knew I wanted to avoid the climatic moment and focus instead on a moment of transition. For lack of a better idea, I decided to run with the moment where Bongo sees Clyde for the first time and comes up with his evil plan. |
|
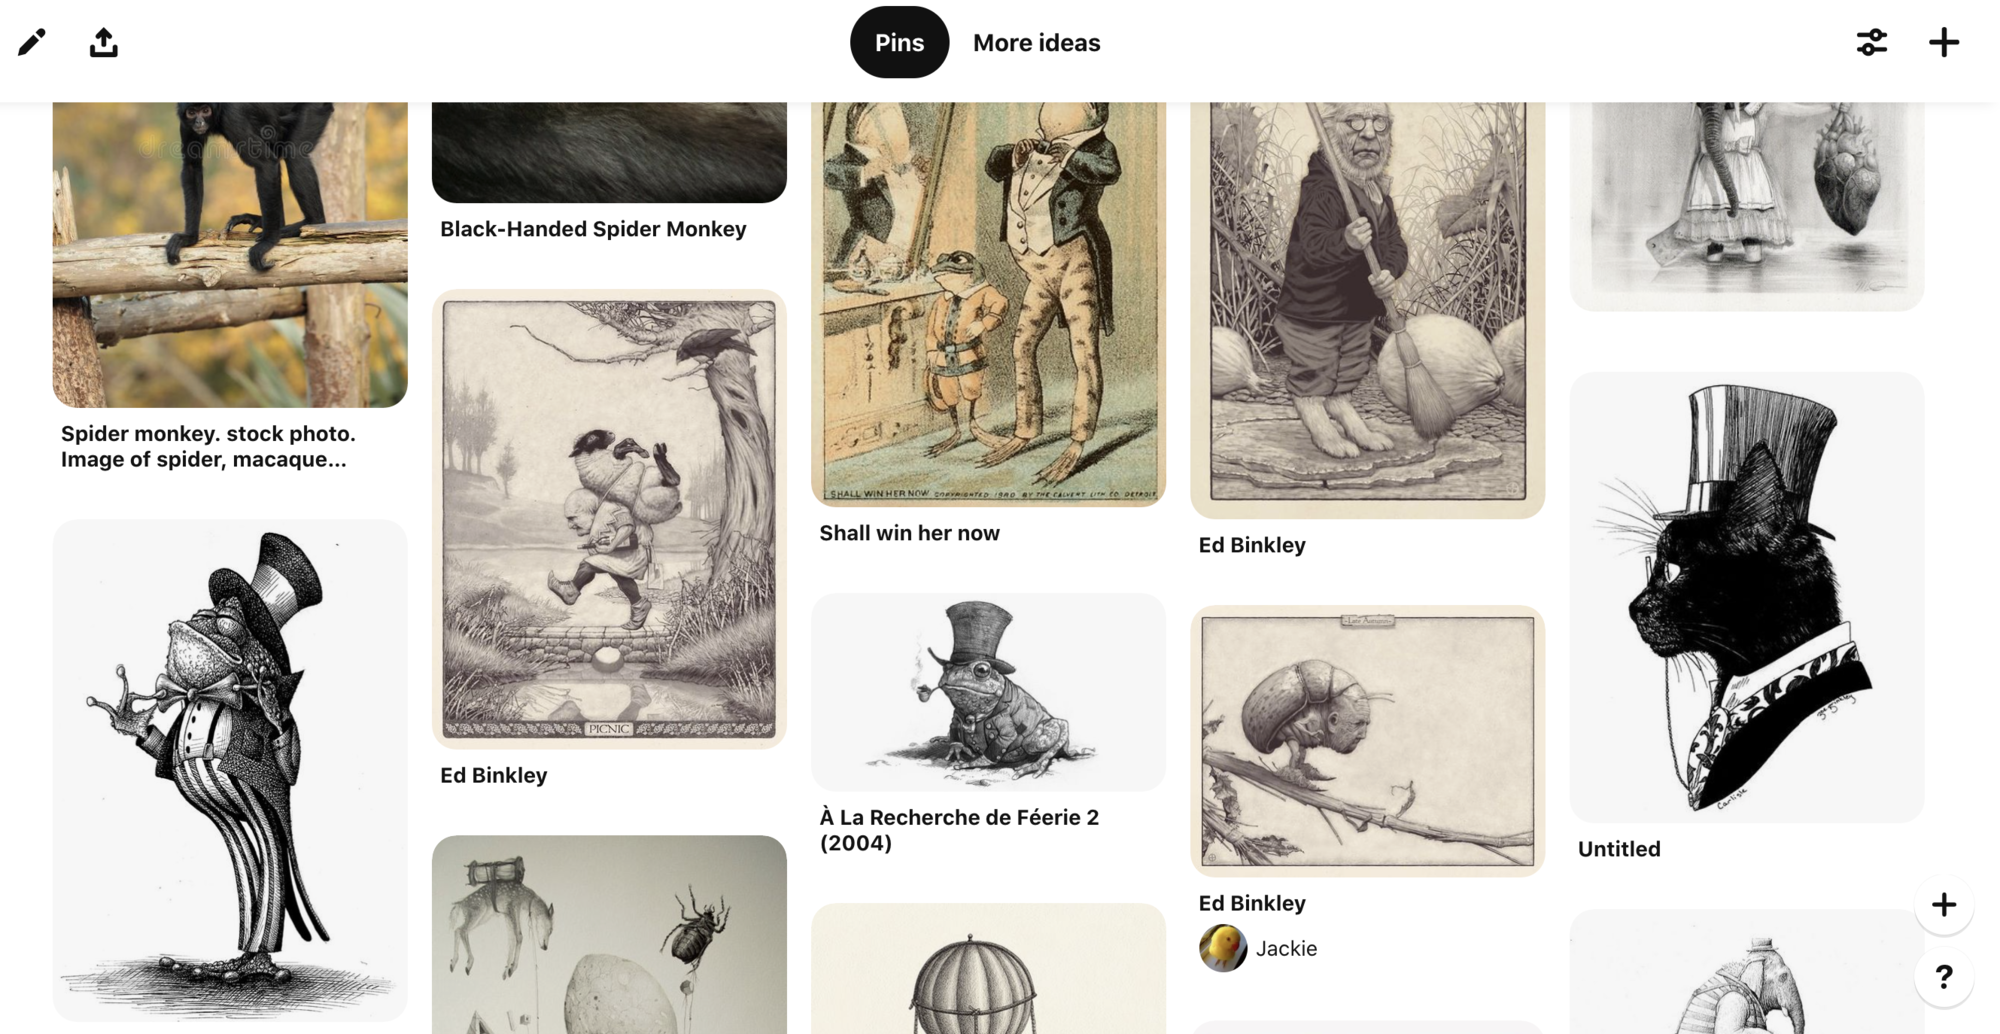
Given the unimaginative moment I chose to illustrate mixed with the fact that this prompt isn't really my cup of tea, I knew I'd have to lean heavily on style to differentiate myself. I turned to Pinterest to collect some ideas. I recently read Anansi Boys by Neil Gaiman and kept thinking about this as an Anansi-style story. So I started there. |
|
Step 2: Choose a Thumbnail and Digitize |
|
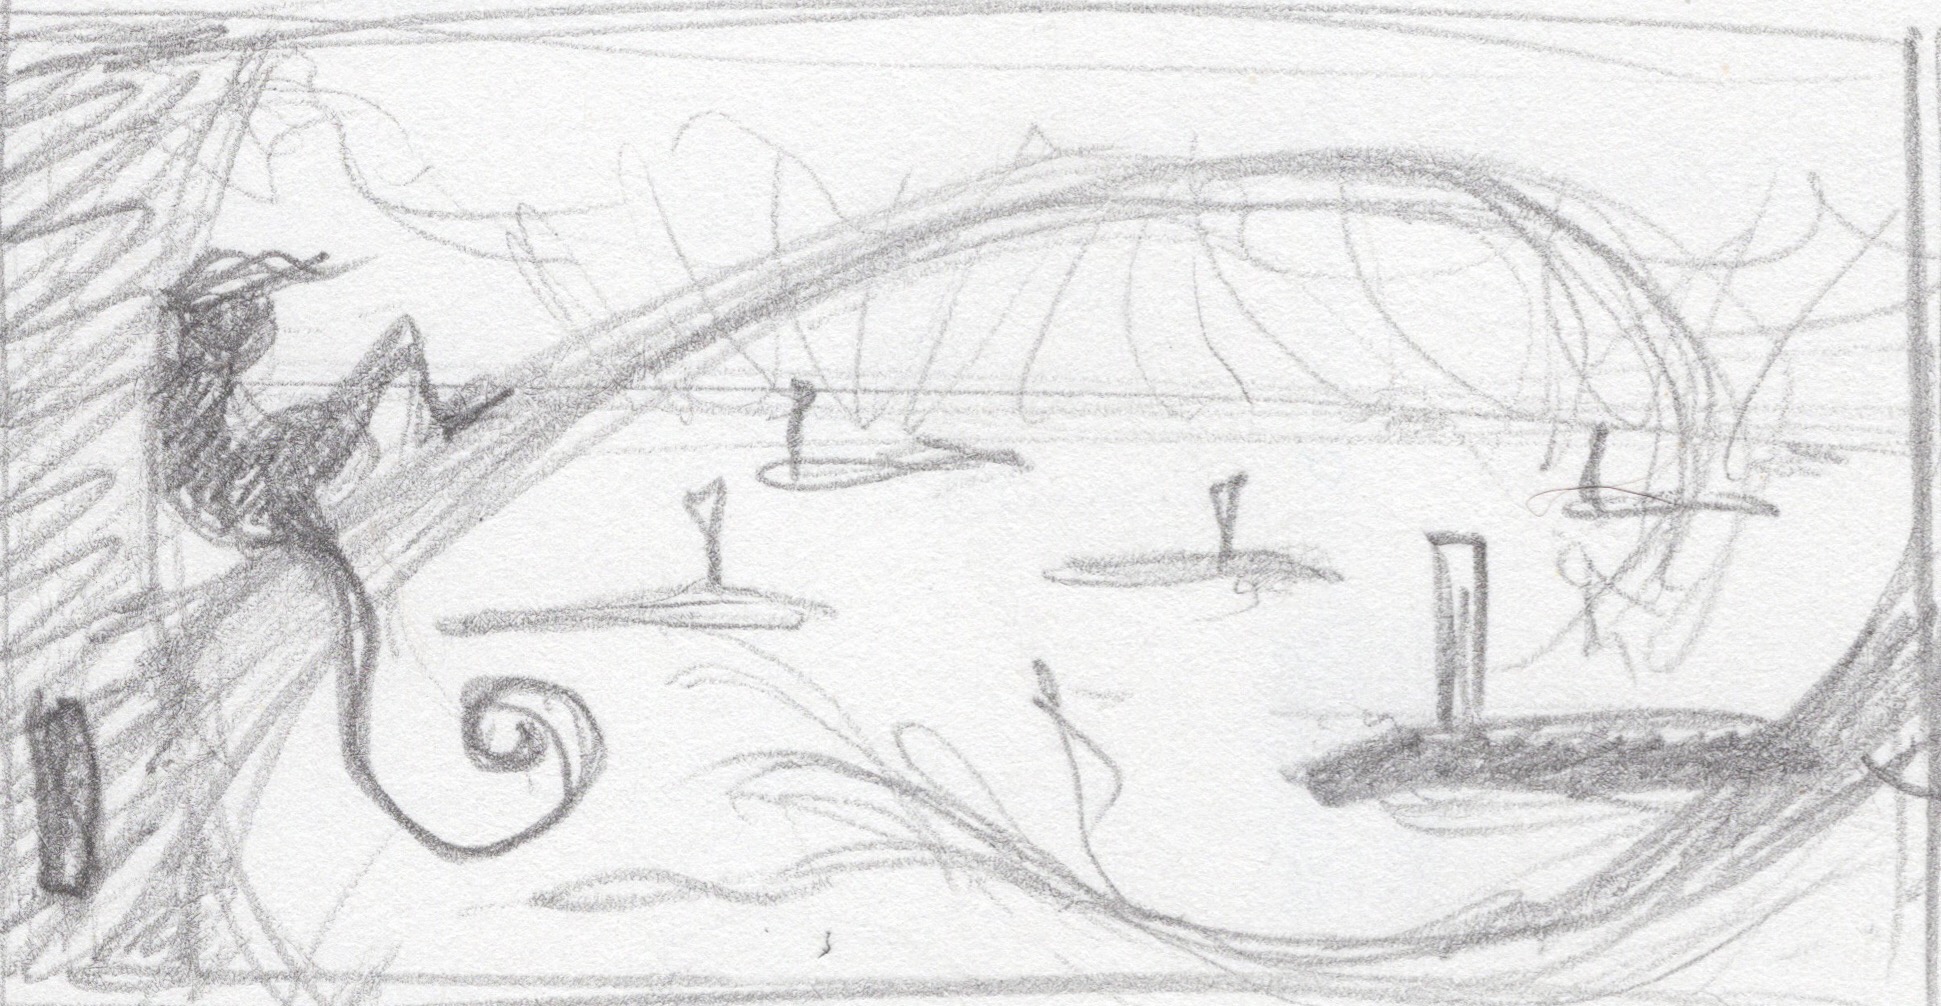
I chose this one. After a few rounds of very similar-looking thumbnails, I realized that I could use the tree branches to lead the eye in a circular path and thought that was kind of cool. I also tickled myself with the idea of a bunch of alligators almost fully submerged with super tall top hats sticking out of the water. I'M HILARIOUS... to myself. At this point, I scanned the thumbnail and brought it into Procreate on my iPad. |
|
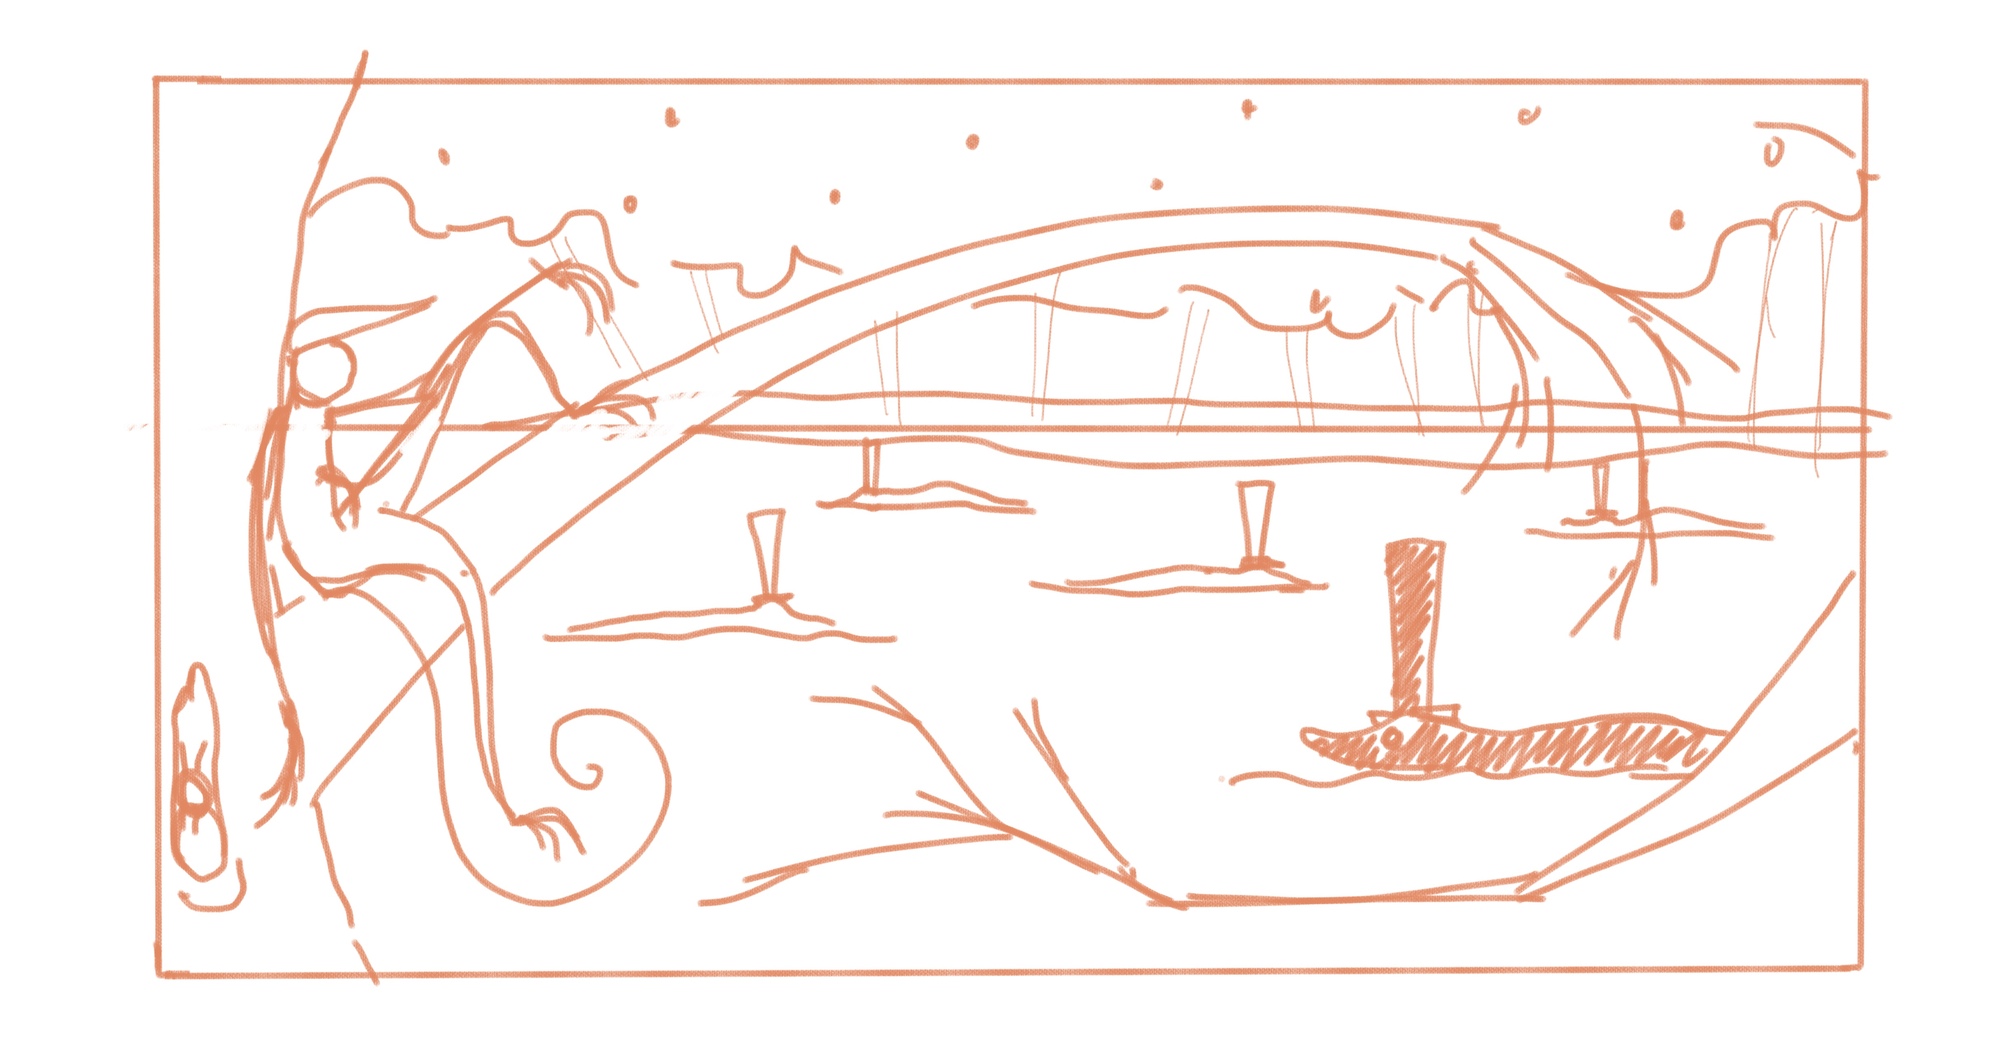
In this pass, I began thinking a little more critically about Bongo's pose, his clothing choices, and some ideas about how to give more visual emphasis to Clyde. |
|
Step 4: A More Detailed Pass |
|
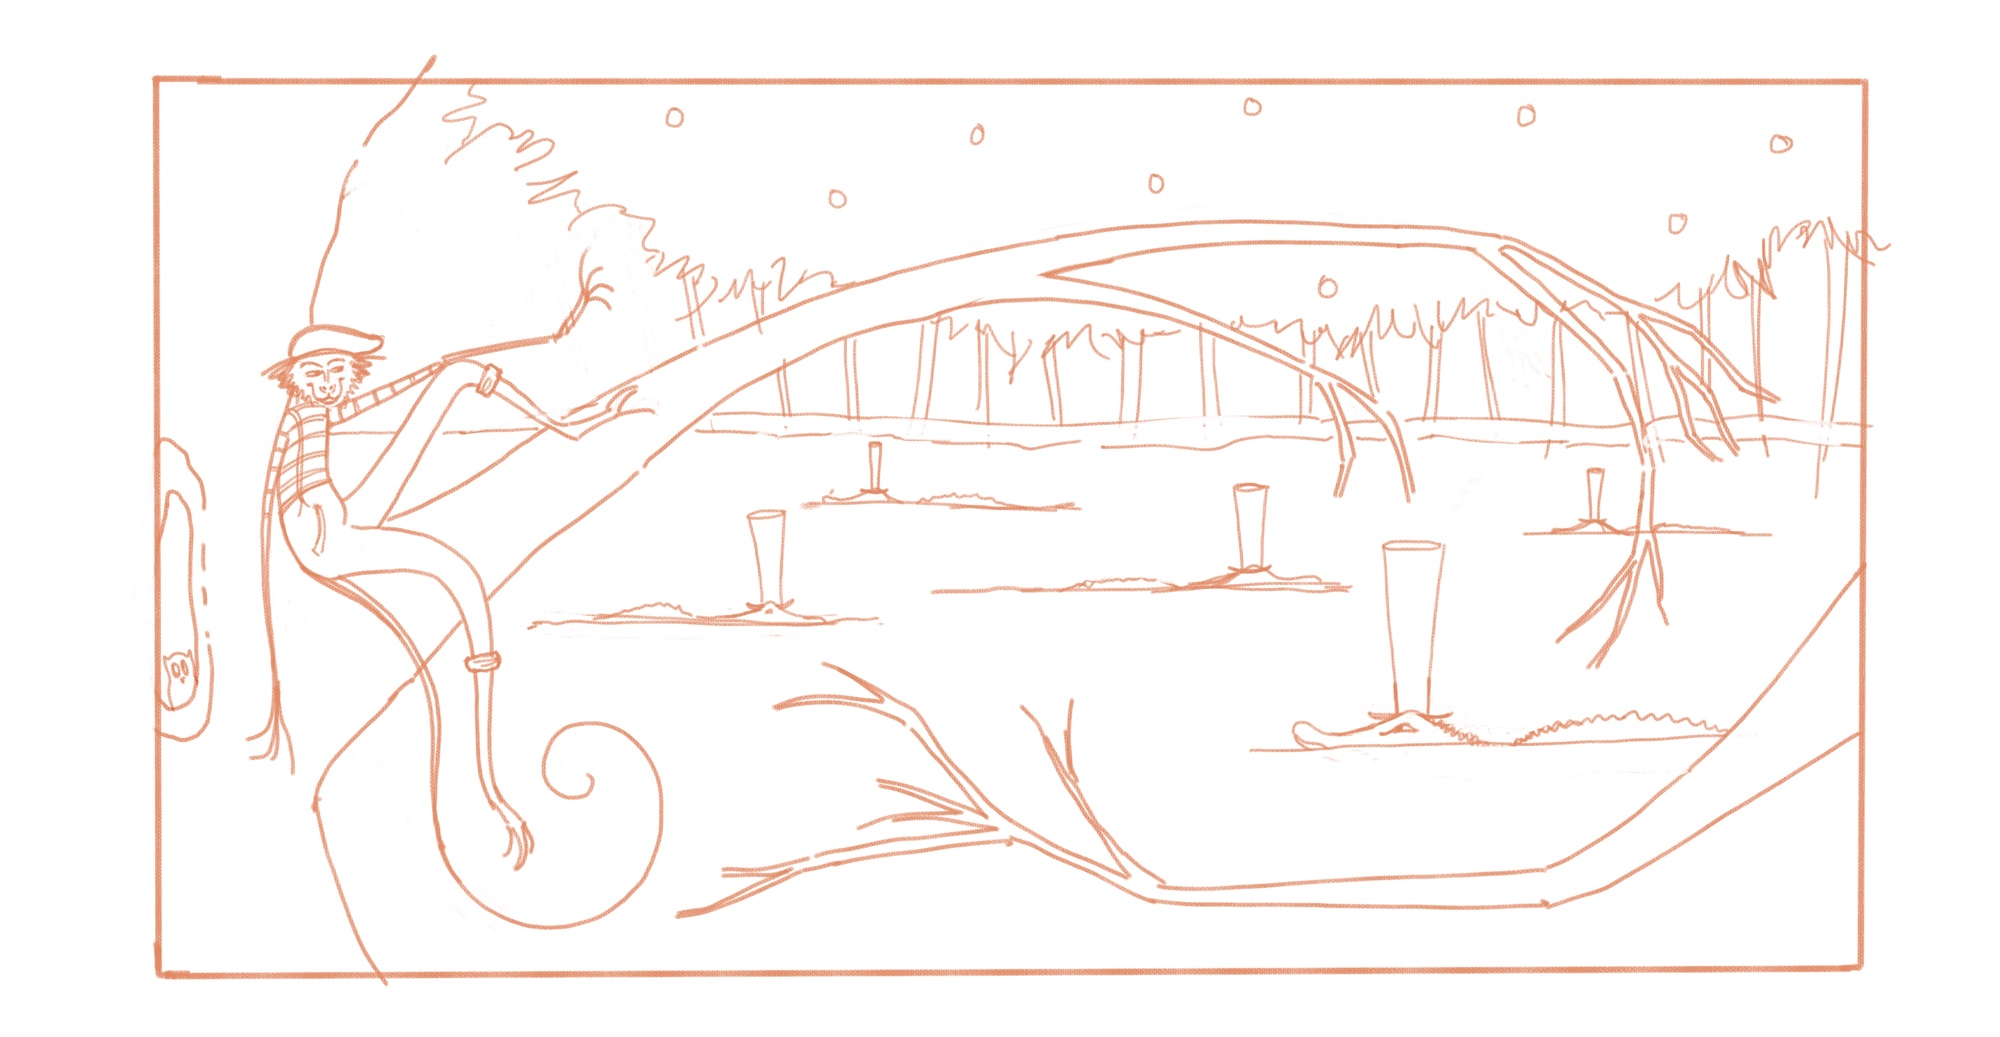
This was a cleanup pass; something closer to a final rough. I added more details to the monkey and began settling all of the elements into their final resting places. |
|
Before I got too far ahead of myself, I wanted to create a value study to highlight the focal points. Will Terry dinged me on a lack of appropriate emphasis last month (as I thought he might) so I wanted there to be no questions about it this time. |
|
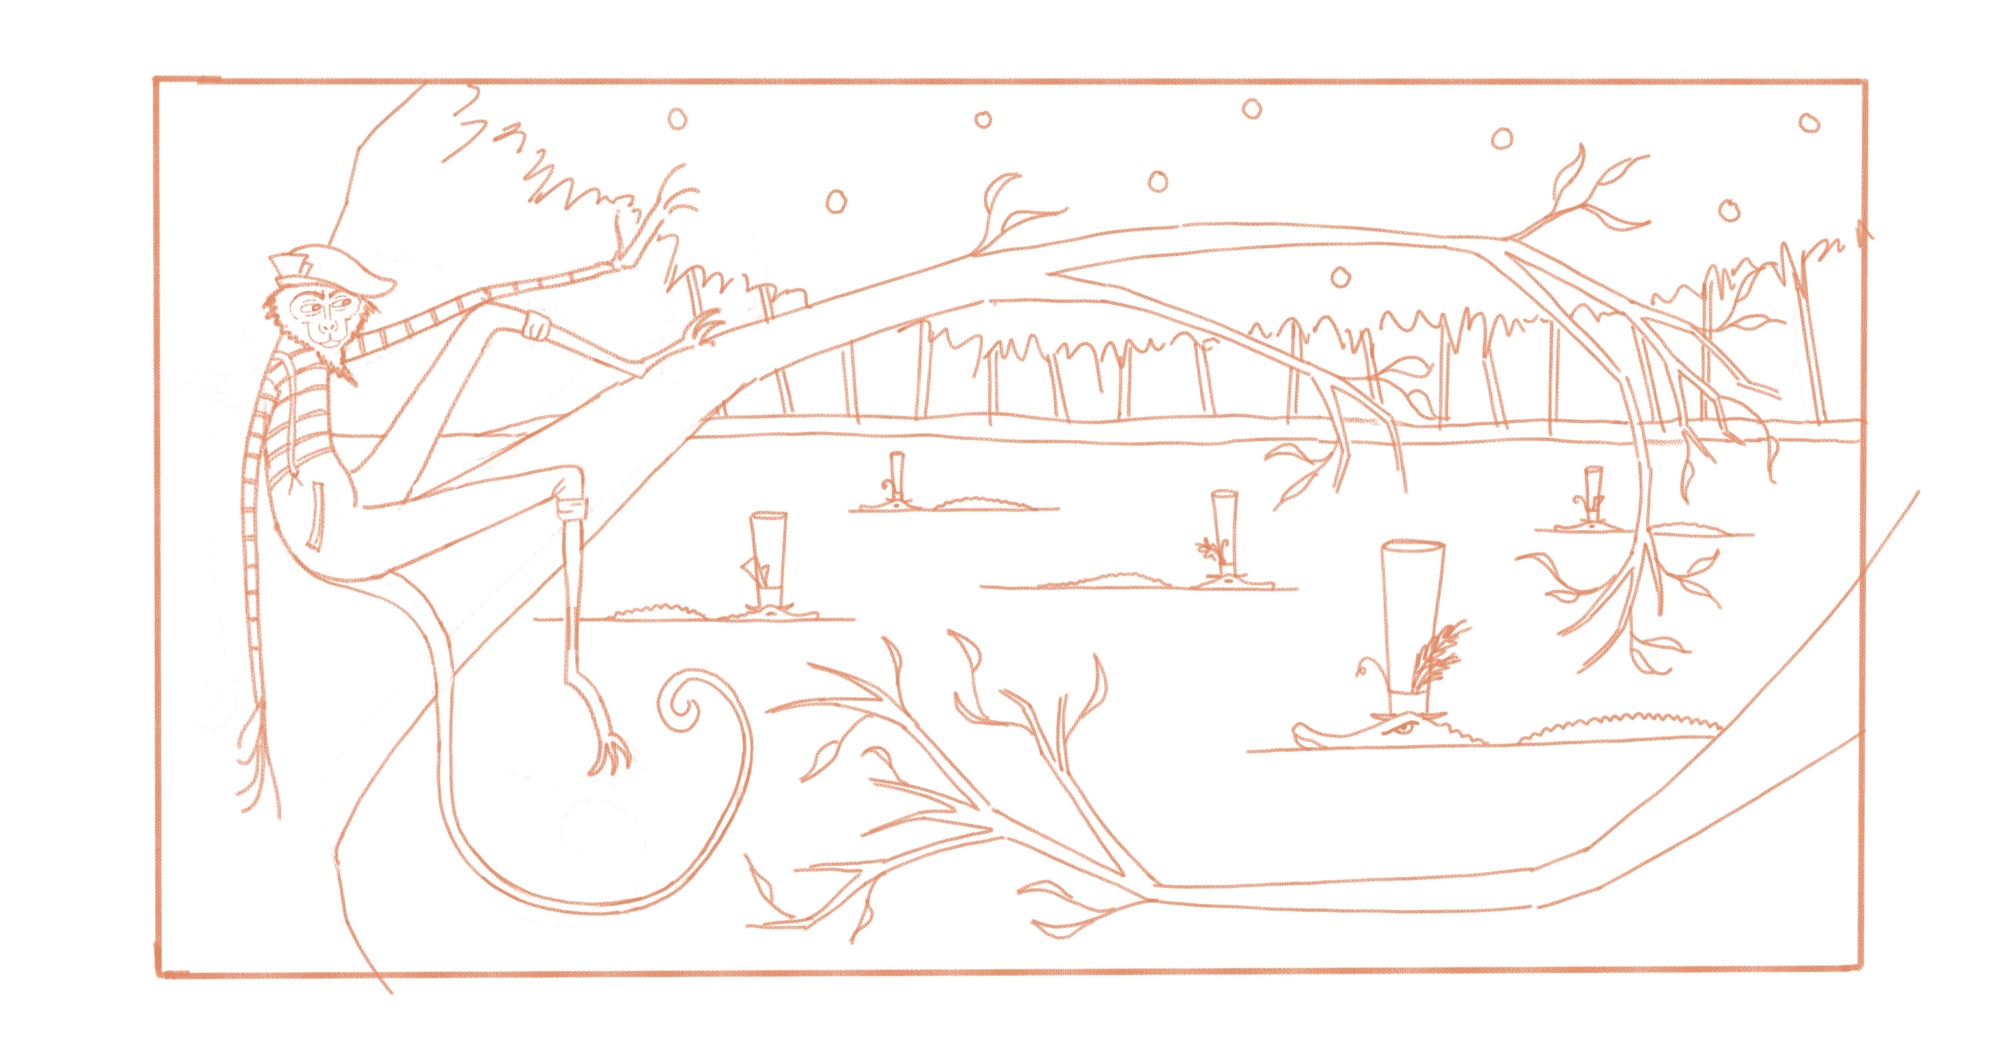
Once the values and the rough sketch were squared away, it was time to move onto the final sketch. I spent a lot of time working and reworking the monkey's pose in this phase. If I'm honest, I still think it's a little weird but finished is better than perfect they tell me, so I moved on. |
|
This is my favorite phase. Sketch in place, this is the time to slow down and focus on the linework. Notice the variance in thickness. Thicker lines draw visual attention to an object and add weight. Thinner ones push things into the background or define interior shapes. |
|
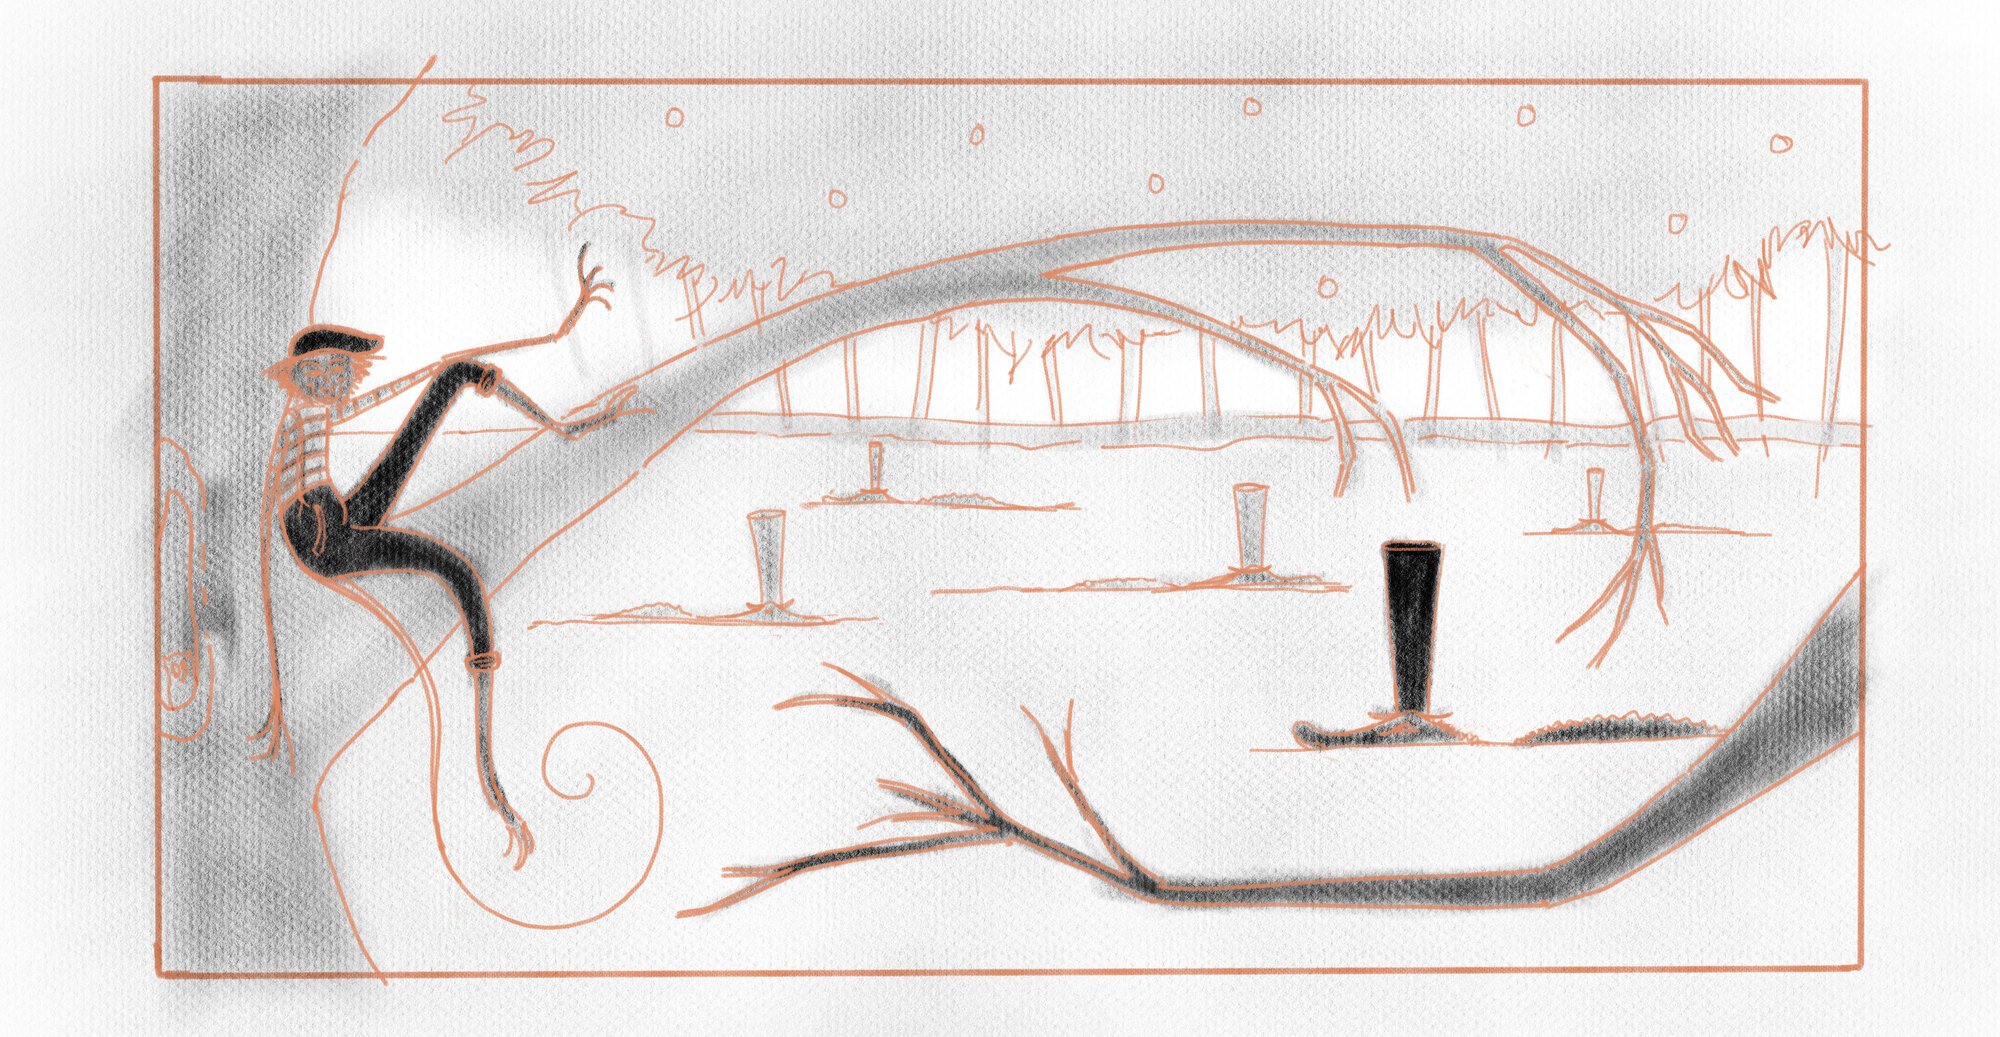
Step 8: Laying in the Values |
|
This step is an exercise in masking, filling, and adding texture. It's important to get the values right in this phase because it will dictate the rest of the piece, but there is some wiggle room in the rendering phase to push/pull things as needed. Notice the monkey—he's all one value right now. This will change in the rendering but I needed to set him up as the darkest object on the page. |
|
Steps 9-300: Rendering the Deets |
|
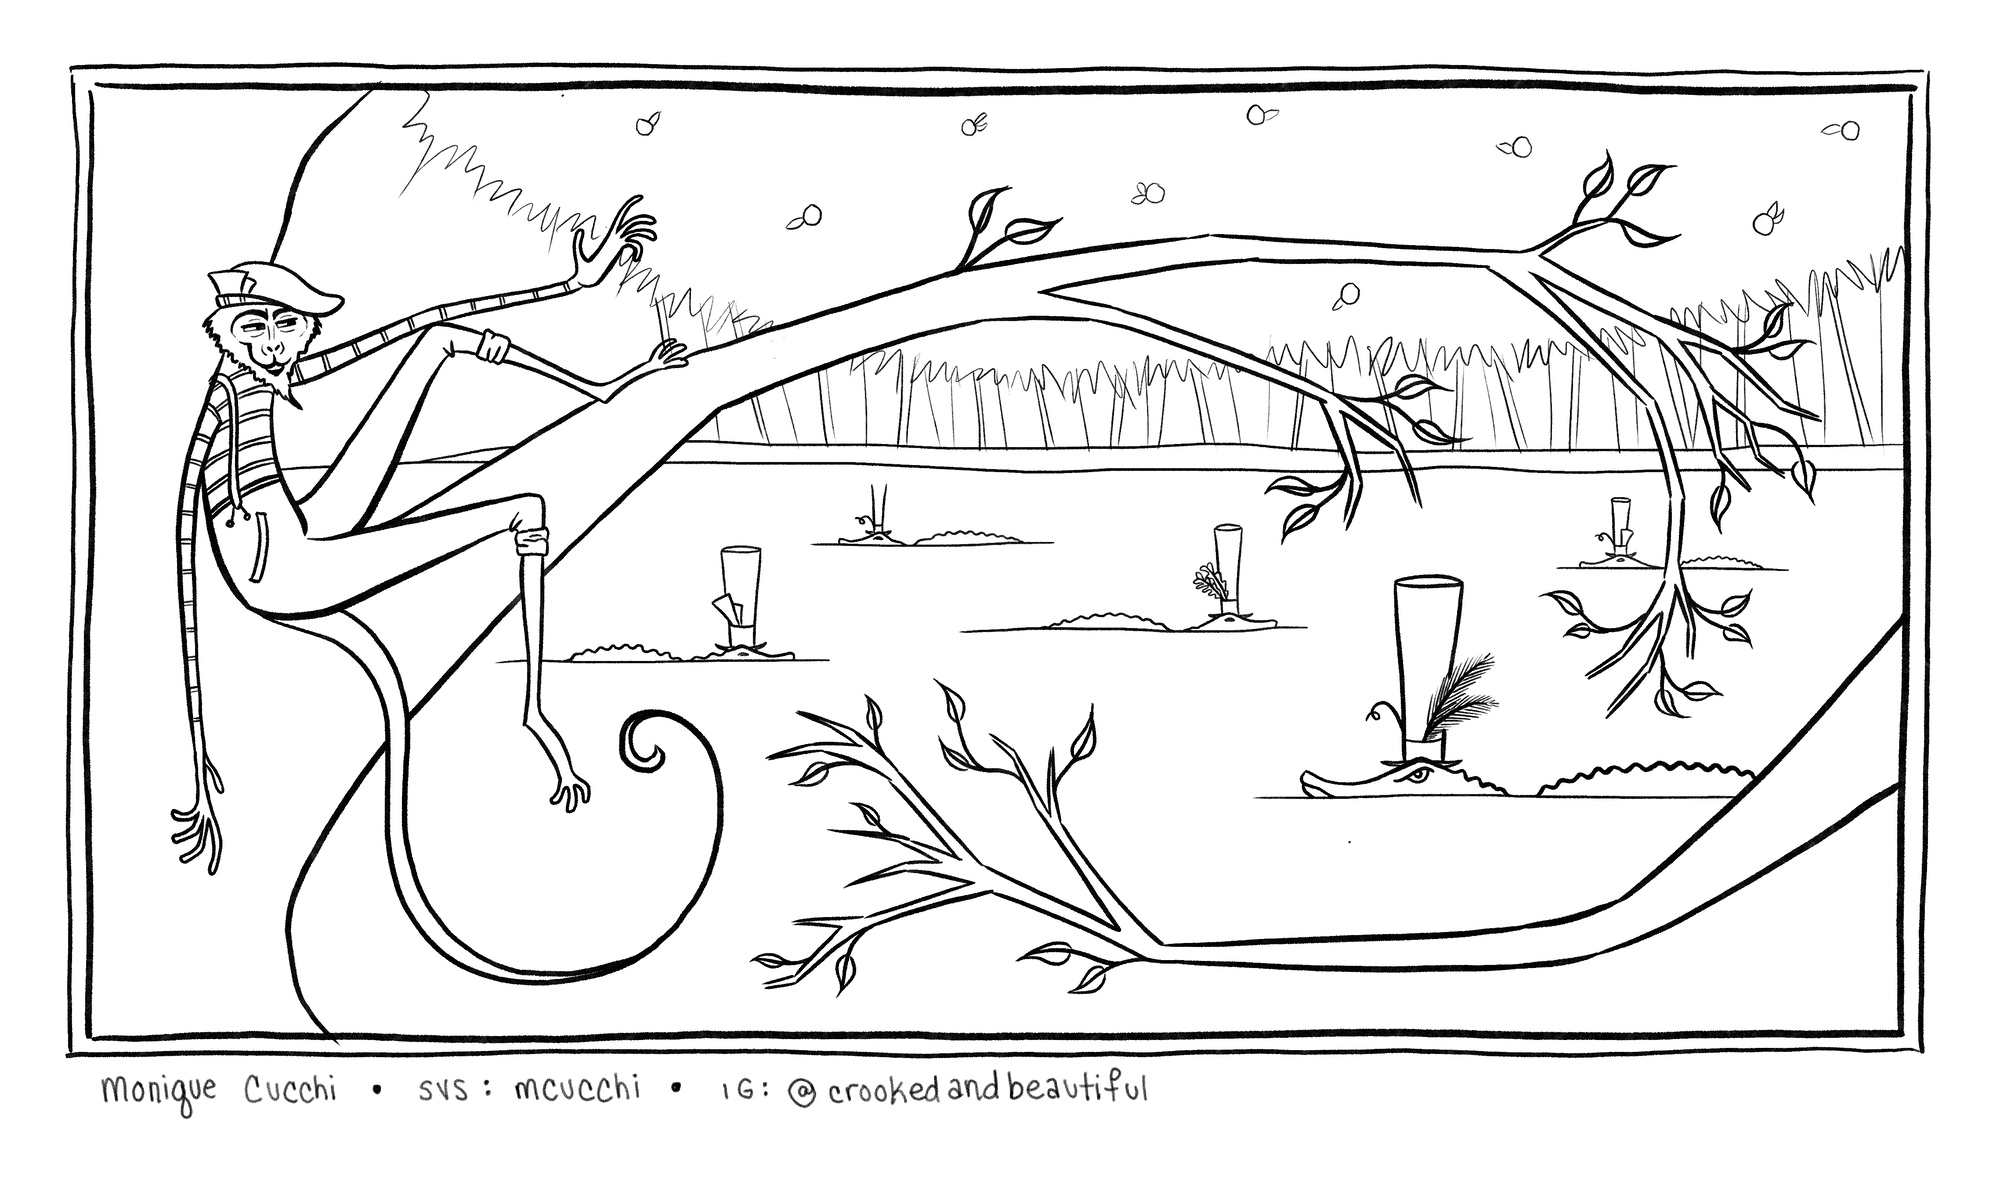
I could create a whole email about this phase alone. It's long and detail-ridden. The gist of it is this: It's important to ensure that your focal point(s) are the areas of the illustration with the most detail and the most contrast. I tried to do that here by giving the monkey the brightest whites and the darkest blacks. I also made Clyde's hat very dark. Perhaps next month I'll do a process breakdown of the rendering steps. We'll see.
Overall, I'm actually pretty happy with this piece. For a while there, I was nervous. Steps 1 and 2 took me about 27 of June's 30 days to complete, but once I picked up some momentum I was able to finish most of the piece in about 2 or 3 days. |
|
| Did you know that I sell originals too? |
|
|
Every Monday, I babble about things such as productivity, creative block, anti-racism education, and any other strange thought that comes to me while left unattended. |
|
That's all for today folks! Stay safe out there. Wear your masks, wash your hands, and I'll be back in your inbox next month. |
|
|
|
|